Adding A Background in My Memories
Most of my Project Life and pocket pages have a background added, like this. A background can add a lot to a page but I also use them to make sure nothing important is cut off when the page is printed (in a book or single print). This tutorial will show you how to get nice even sizes for your background. If you have different sizes don't be surprised when people looking at your books or albums look a bit seasick!

What we're doing here is creating a 12" x 12" page (at proper professional print resolution of 3600 x 3600). Your PL layout will be about 11" x 11" within that page ie it will appear to have a border of 1/2" - 5/8" around it when printed depending on your print service.
Let's assume you've made your basic pocket page in the Project Life App, PS/PSE or any way you like. Make sure it's saved as a jpeg - and that you know where to find it on your computer!
Open a new page (or new album) in My Memories. Go to this page if you need to know how to do that. Leave the border as it is. If you already removed it click CTRL-R to get it back again.
Click on photo to get a photo box. This will appear in the middle of the page. Now, with your mouse, grab hold of the grey squares in the corners of the photo box and drag them until the box reaches right up to the page border. Don't worry, the photo box will remain square as long as you only drag the corners. Messed it up? Delete that box and just add another one. Don't rely on your eye to tell you what's square!
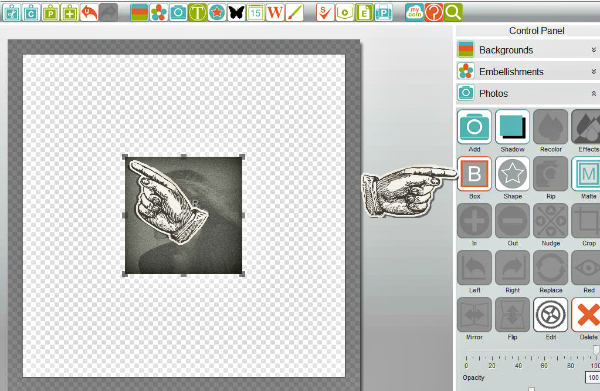
Now this is really important: Go to the Arrange button at the top and then Align and Click on Center Vertically on Page, then also on Center Horizontally on page. It's important to do it now but you should also do this at various times if you have something centered on your page. It is quite likely you will accidentally move your main image off centre while working on the page. Make sure you check just before exporting the page for printing!
Now let's get rid of that border!
Click CTRL+R and it will disappear.
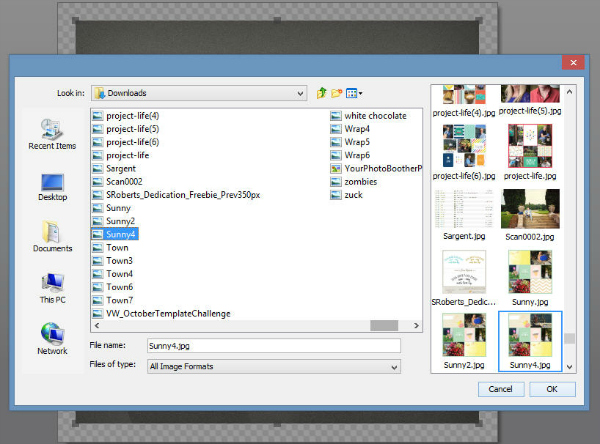
Double click on the big photo box and a window will appear. Select the photo you want on your computer. The "photo" you want for this exercise is a layout you just made in the Project Life app, PSE or some other way. The program can't tell the difference between a single photo, a paper or a layout made of several photos. A jpeg is a jpeg ...
NOTE: Another way to do this is to open the Photos menu on the left hand side and drag your layout over to the photo box.
Click CTRL+R and it will disappear.
Double click on the big photo box and a window will appear. Select the photo you want on your computer. The "photo" you want for this exercise is a layout you just made in the Project Life app, PSE or some other way. The program can't tell the difference between a single photo, a paper or a layout made of several photos. A jpeg is a jpeg ...
NOTE: Another way to do this is to open the Photos menu on the left hand side and drag your layout over to the photo box.
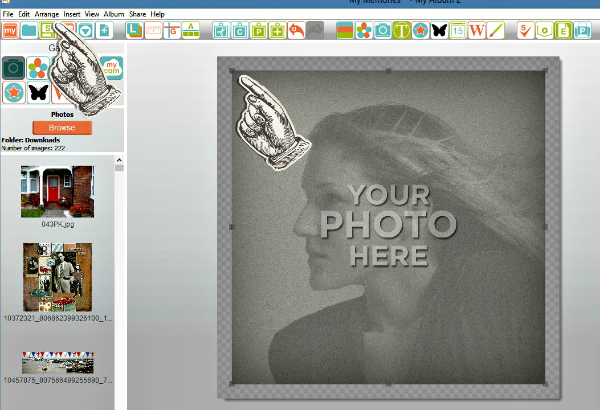
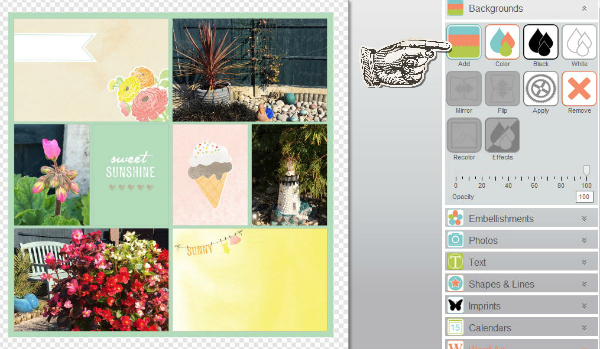
Your page will look like this (with your own layout in thne middle, of course!). The chequered bit around the picture indicates there is nothing there. So let's add a background. Click on Add in the Backgrounds tab on the right:
NOTE: if you would rather extend the existing border of the PL page go to this page now)
A new window will open. Choose Browse in order to select a background from "outside" the My Memories program.

Your background will appear behind your layout. You can change the background at any time.
TIP: If you want to audition several backgrounds go to the thumbnail of the page at the bottom of your work screen, right click on it and "insert duplicate page". You can do this as many time as you like and you can then play with the background without messing up your original work.
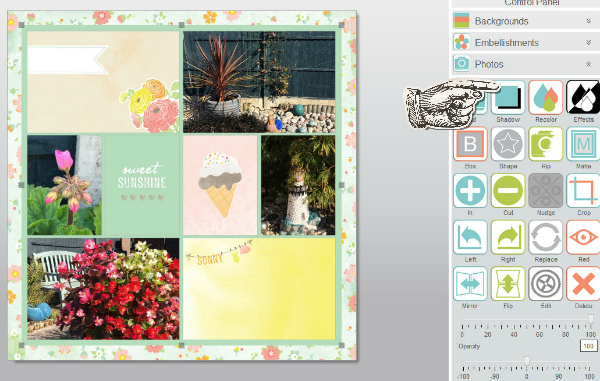
Now let's add a shadow to the main photo. Click on it to make it "active" ie to tell the program you now want to do something with that big photo box. You will see the grey squares around it. Click Shadow in the control panel on the right. (If you don't see that Shadow choice you might not have the photo box selected so check that)
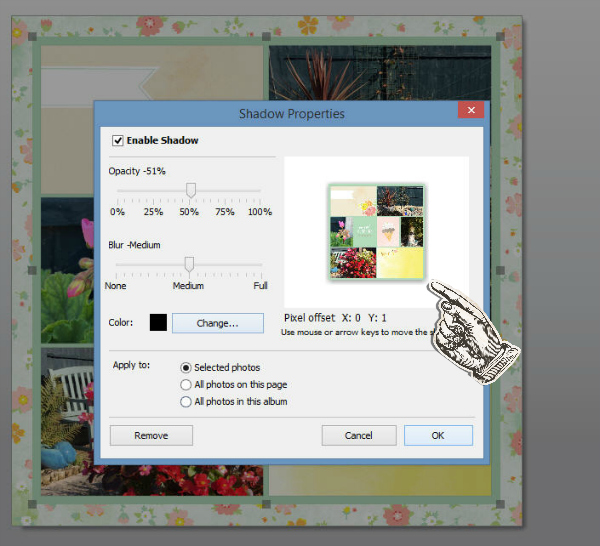
The shadow window will appear. That sounds like something out of a Stephen King novel....
You can change the settings AND you can grab the shadow with your mouse and move it. Here I've created a wide shadow and moved it so that it shows the same amount beyond the picture all round.
This is no doubt against someone's rule. I can guarantee that in your scrapbooking career you will come across plenty of rulemakers so I'm going to tell you my two rules about shadows:
1) Add whatever shadow you like
2) If you don't like the effect, remove it
Everyone needs to find their own style. What I'm showing you here is just what I tend to do when adding a background to pocket pages. Your page should than have just enough shadow to make it stand out a little for the background when printed. You can carry on and add extra emebellishment and/or text if you wish.
NOW SAVE YOUR PAGE! Click HERE if you don't know how to do that.
TIP: How to get the same amount of background showing on all the pages in your album
There are two ways to do this:
1) If you know your album will have several pages open a new page, add the photo box, center it etc then add the shadow. Right click on the thumbnail at the bottom of your layout screen and select "Insert duplicate page". You can do this as many time as you like. If you always leave one "spare" you can add more as you go along
2) Before you add your photo save your background "template". Literally, save it as something like BackgroundTemplate. Whenever you open an album use the Import function ("Insert" at the top then Import) to bring in your template
Don't have MY Memories yet? Click HERE to save $10 and get $10 in free kits.
