Making Polaroid Style Cards in the Collect App
The Collect App is a very clever app which allows you to make collages of daily photos. I don't use it for this! Any daily requirement to do anything, even getting up in the morning, tends to give me the heebie jeebies....
I use it to make the 3" x 4" polaroid style cards you can see in this page. (Click HERE to see a res version so you can zoom in and read the text on them)
I use it to make the 3" x 4" polaroid style cards you can see in this page. (Click HERE to see a res version so you can zoom in and read the text on them)

I made this page in the Project Life app using the Project 52 week card and filler cards form the Aqua kit. You can just save the individual cards instead and use them in a regular digi or paper page. You can make a whole page of the Collect cards or intersperse them with filler cards, larger photos or more journalling.
Paper Scrappers - you can also put text etc on the back of these cards, just click the little toggle arrows at the bottom of the screen. I understand Persnickety Prints has a special print size for these too so they can go straight into the Project Life page protectors.
Paper Scrappers - you can also put text etc on the back of these cards, just click the little toggle arrows at the bottom of the screen. I understand Persnickety Prints has a special print size for these too so they can go straight into the Project Life page protectors.
How to do it ...
Making these cards is easy BUT the app has a few quirks and you need to set it up properly to avoid "what happened there?" frustrations.
NOTE: You need to pay to upgrade if you want to use different fonts, have more than one photo for each day or use multiple albums.
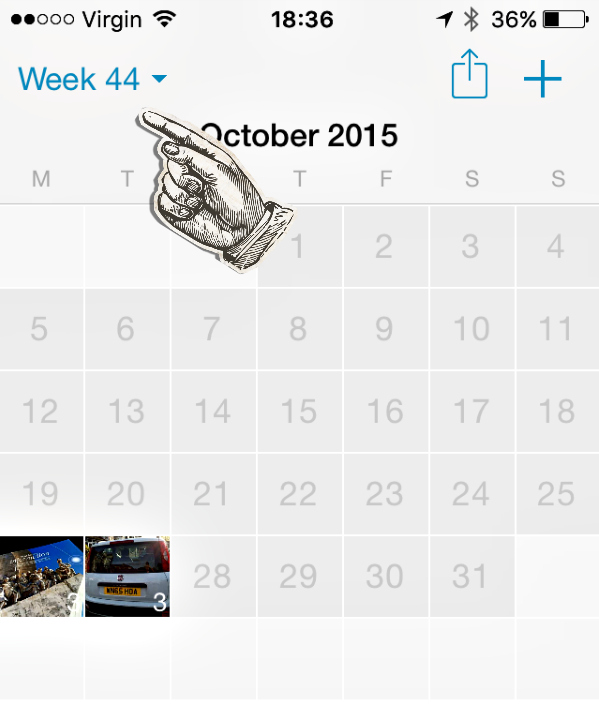
You can use just one album for the month so all your photos show on the calendar but you might want to use smaller albums when you discover what happens when you export them to your camera roll. I set up an album for each week. Even if I don't use the cards it's useful to have notes of what happens.
Click on the album name to start a new album (type the name you want in the New Album slot on the next screen)
NOTE: You need to pay to upgrade if you want to use different fonts, have more than one photo for each day or use multiple albums.
You can use just one album for the month so all your photos show on the calendar but you might want to use smaller albums when you discover what happens when you export them to your camera roll. I set up an album for each week. Even if I don't use the cards it's useful to have notes of what happens.
Click on the album name to start a new album (type the name you want in the New Album slot on the next screen)
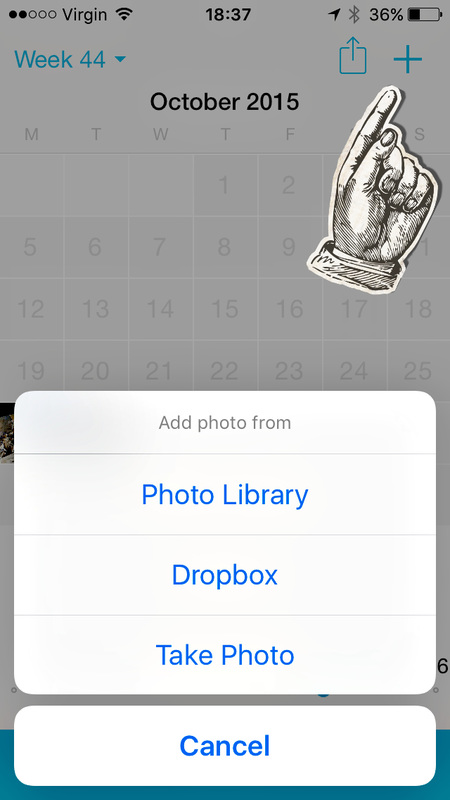
Click on the + sign to add a new photo. You get to choose whether to take a new photo or use one from your photo library or Dropbox.
If you are trying to add a photo taken on a different day from the day you selected it will ask you which date you want to assign to the photo.
If you are trying to add a photo taken on a different day from the day you selected it will ask you which date you want to assign to the photo.
You can now crop the photo - we need square for these cards - and add any text you want. If you have several photos already in a date slot you can click on the arrows at the bottom of the screen to see what you have. Like this:
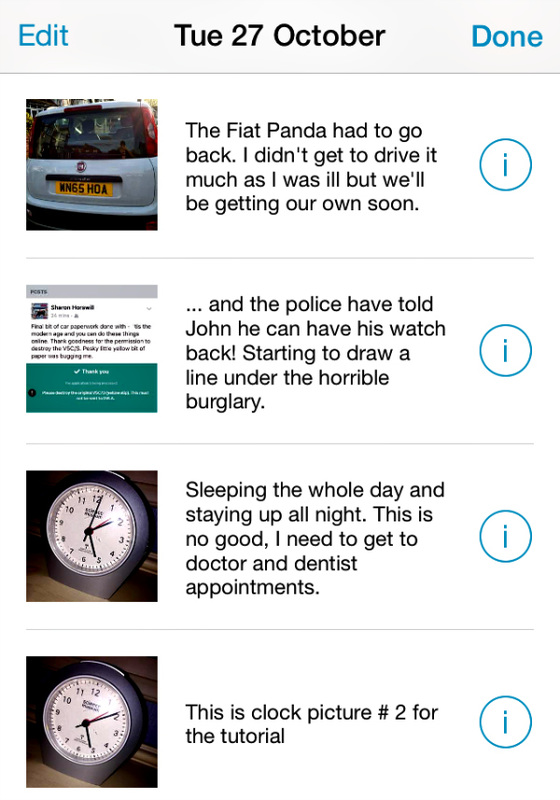
Click on the photo you want to see the details.
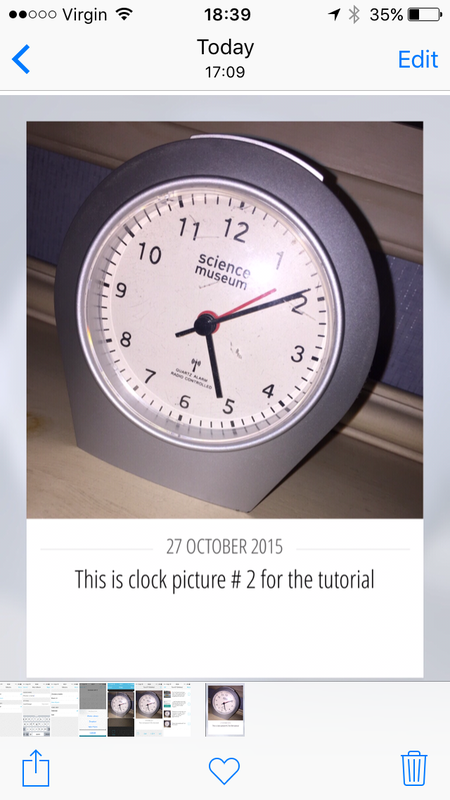
Now you CAN export from the individual photo screen - just click on the share button at the bottom - but the edges of your photo will look like this with a grey-ish border. It has the border all round, this is a picture of my camera roll showing the exported image which cuts it off a bit. This is fine if you want them like this - it can look very effective against a white background when you use the cards in the Project Life app - but if you want them all white you'll need to export the whole alnum as show below this pic.
Now you CAN export from the individual photo screen - just click on the share button at the bottom - but the edges of your photo will look like this with a grey-ish border. It has the border all round, this is a picture of my camera roll showing the exported image which cuts it off a bit. This is fine if you want them like this - it can look very effective against a white background when you use the cards in the Project Life app - but if you want them all white you'll need to export the whole alnum as show below this pic.
Exporting Your Album
The clue is in that heading! In order to get the right format of picture for your card you need to export a whole album's worth of photos. This is a good reason for having small albums. If you tend to edit and export your photos several times you might want to delete them from your camera roll before you export otherwise you will end up with multiple copies and it's all too easy to select the wrong one for your layout when you're working with a tiny screen.
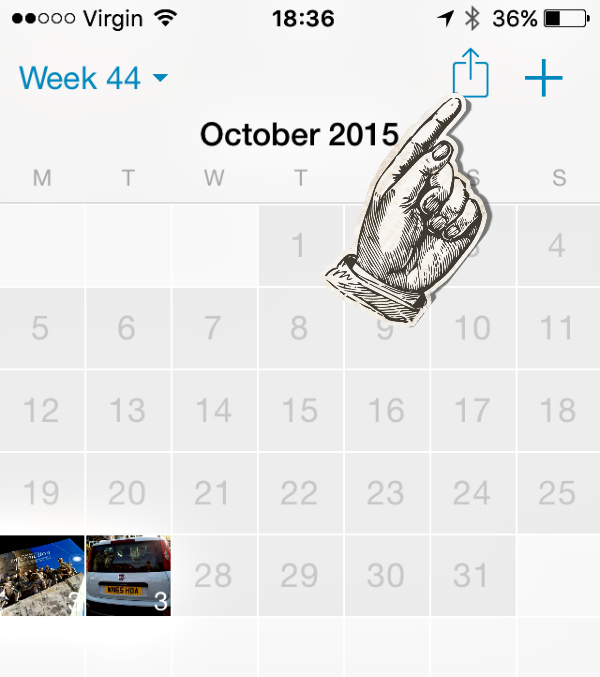
Here's how you set it all up properly. Go to the calendar view and click on the export button at the top:
Here's how you set it all up properly. Go to the calendar view and click on the export button at the top:
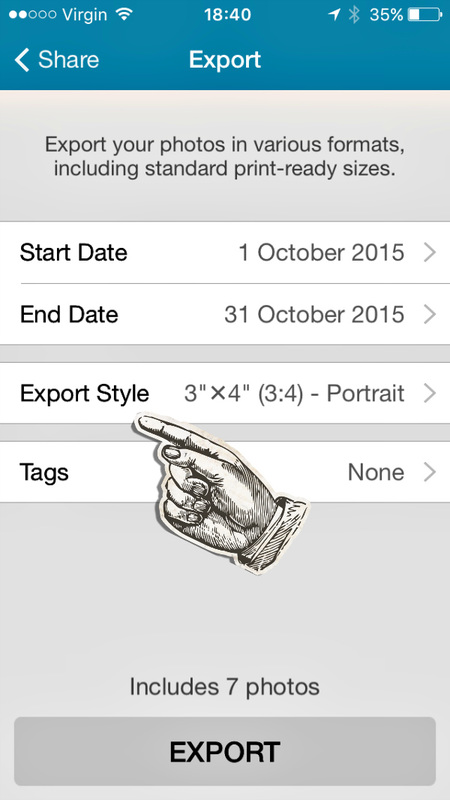
On the next screen you can limit the dates you want exported if you like.
Click on "Export Photos". Then click on Export Style:
Click on "Export Photos". Then click on Export Style:
The next screen is VERY important! This is what you MUST select:
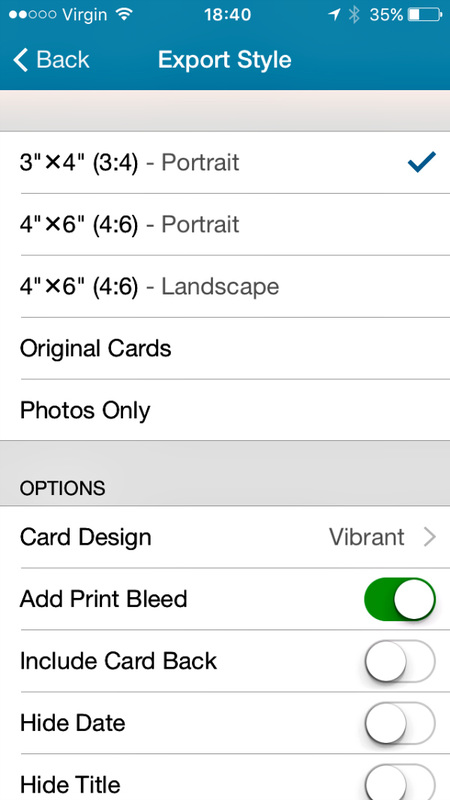
As you can see. there are various options like card design and whether to include the date. You can choose what you like there but it's important that you choose the right size and Add Print Bleed (even if you are not going to print the cards individually).
You can also select the option that enables the phone to remember your choices. I can't show you that as my phone is remembering it! Once you are happy your Export Style screen is correct click on Back at the top. Then click on Export.
Your photos will go into the general Camera Roll and also in a Collect album which is created automatically in your camera roll. You can then bring them into your PL or other collage apps and transfer them to your computer for digi scrapping.
